 Get a pack of cheap, plain card bases from a craft shop, or The Works, or Range, and get children to draw and colour in Christmas pictures. Stick some ribbon around the edges, and you have unique handmade cards for granny, aunties, etc.!
- Cut a potato in half, and carve a simple design, such as a star, moon, Christmas tree, or snowman. Get a roll or pack of sheets of white or brown wrapping paper, or some leftover lining paper, and some saucers with poster paint in red, green, gold or silver. Let the children go wild stamping potato prints of the design on the paper, to make lovely wrapping paper to wrap gifts for friends and family.
 A large Potato print design could be used to stamp a single image onto a piece of paper, then cut it out to stick onto a card, to make a design that is carried through from Christmas card to wrapping paper. Sequins and buttons, or bits of wool and ribbon, could be stuck securely onto a tree design to make decorations with PVA, once the paint is thoroughly dry, or marker pens and paint can add more details to the design.
- Instead of using paint, stamp the paper sheets with PVA glue, and after a couple of minutes stamping, while all the glue is still damp, sprinkle a good layer of glitter over the paper, then shake off and save the excess, to reuse on the next sheet. Once one colour of glitter has been applied, you can go back and restamp between the first motifs, and spread a different colour of glitter, or stay with one colour for a more restrained look. Always make sure that paint or glue are completely dry before using the paper wrapping!
 Older children might like to make a potato print that uses different colours. A Potato Bird shape could be painted in brown, red, and white, to print a Robin, with black added when dry for legs and eye. By applying the paint to the appropriate parts of the potato with a brush, they can print cards or wrapping paper with their own design. Older children with a real interest in art and crafts could be given an early gift of a Lino Cutting set to make their own designs, but be sure that they are responsible and careful - the lino-cutting tools are really sharp and could be dangerous in smaller or less sensible children's hands! Lino cuts are generally printed in one colour, but when dry the other colours can be applied by hand.
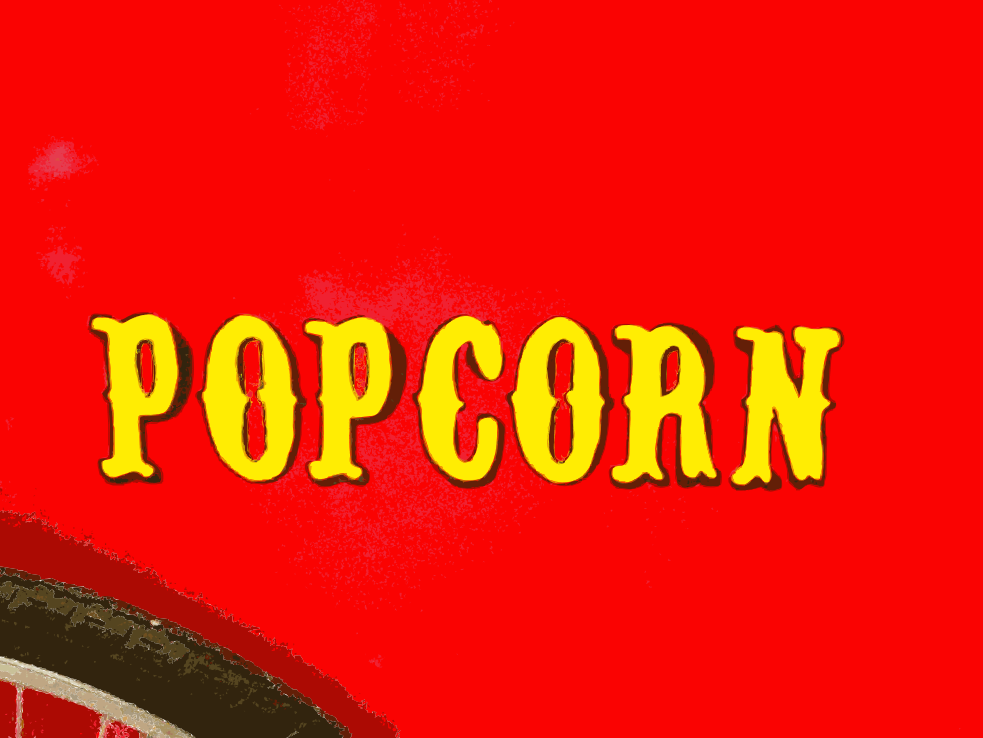 Make an alternative, edible garland for the tree! Pop some pop-corn, and thread it onto fine string (or doubled cotton) with a large needle, such as a tapestry needle. If you want a more festive finish, apply gold or silver edible food colouring (NOT just paint), or EDIBLE Glitter (The ordinary type of glitter is normally Plastic based, and should NEVER be consumed!). If no-one wants to eat the pop-corn, it can be hung from a bird table or tree branch, and birds will thank you for the treat!
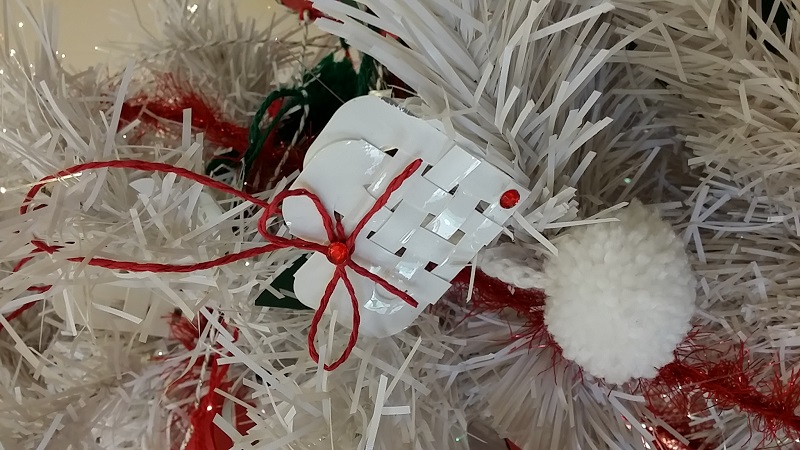 Children like to make Pom-Poms, and with modern pom-pom making tools, it is now much quicker and easier than it was in the days of two cardboard circles. However, it is still possible to make a pompom by cutting two rings from stiff card, threading the wool through the middle, and over the rings repeatedly, until the rings are wel covered and the hole is virtually filled in. Cut between the cards, then thread some more wool or string between them, and tie as tightly as possible, to secure the wool, leaving long ends to hang the pom-pom, then ease the cardboard off the wool. If the pom-pom looks a bit messy, it can be trimmed with sharp scissors to neaten it up, or achieve a different shape.
- Pom-poms can be used to make more than a ball! If you want to give a pom-pom arms or legs, wind a pipe cleaner round the middle after tying it off, and before removing the card. Two white Pom-Poms can be stuck together to make a snowman, and decorated with glued on felt eyes, nose . buttons, scarf, and perhaps a cardboard top hat! Use a glue like evo-stick or a fabric glue rather than PVA for this, or you risk them falling apart. A pompom which has two-thirds brown, then a little white and the remainder orangey-red, with black legs, felt eyes and beak and stuck-in brown felt tail "feathers" makes a Robin, but a simple bright colour yarn, or even a glittery yarn, can make a lovely bauble. Don't make the pom-poms too big, though, as large pom-poms tend to "flop" and become very heavy as the size increases - a disk of about 3 or 4" with a hole that takes up around half of that diameter is a good size.
- Miniature Pom-poms can be made into a Garland for the tree, or used to wrap around a gift for a unique look. To make a mini-pompom garland, you'll need a length of wool (that will be seen) about a quarter longer than your required garland, a fork, and your pom-pom wool. Lay the wool length between the middle tines (prongs) of the fork, then wind the pom-pom wool around the outside of the fork, over the length. Bring the length of wool up and tie it tightly around the middle, then slip the whole thing off the fork and cut the loops at each side. Fluff up the wool to make a ball. Move the wool length along a few inches, and lay back between the tines, make another pop-pom, and tie off and cut. Repeat until you reach the end of the length required. As this is fiddly, it may be one for older children. You might want to make some tests first, to see how many turns of the wool you are using make a good pom-pom, as too few looks sparce and wispy, but too many are hard to tie tightly. As a rough estimate, 12 to 15 turns usually works with Double knitting, but 4 ply needs a few more.
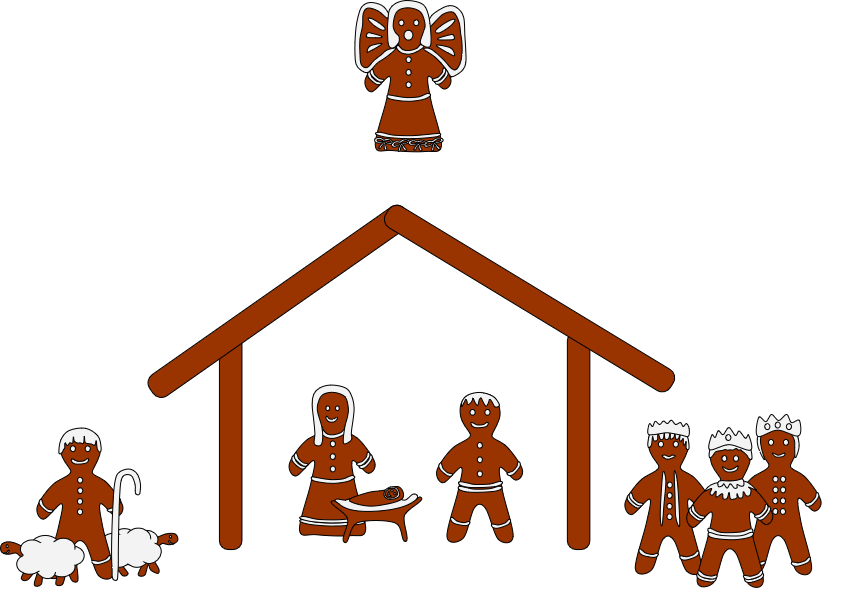 Older children may like to make a Nativity scene using air drying clay and matches or cocktail sticks. This can come out year after year, and have more added to it as the years pass. A small piece of clay about 2.5cm long, and as thick as a finger, with a flat base is the average size. A small round pencil end pressed lightly into one side, just below the top makes a face, and a disk of clay about twice the diameter stuck to the opposite side can be a Halo. Female pieces should be slightly smaller, and Male pieces need a headdress - a simple thin semicircle of flattened clay boulder about the head, with a thin snake of clay tied around it at forehead level. Shepherds crooks and lanterns can be modeled onto a match or cocktail stick, cut to length, and pressed into the clay body about half way up. Angels and Kings bodies are also made a little bit smaller, but have a small ball for a head, and added hair. The kings, each need to have a crown on their head, a casket containing their gift held at waist level, and a cloak trailing behing them. The Angels all have wings and a Halo added. Animals can be made without legs such as sheep, or laying down asses, but standing oxen and asses need four legs made from match or cocktail sticks, as do the camels that accompany the Kings, although camel's legs should be a bit longer than the oxen and asses. Once these pieces are thoroughly dry, paint them carefully with acrylic or poster paints, and finished with a water based paint-on or spray-on varnish. Suitable colours are a tan colour for most faces (but make the kings different colours to represent different races),Blue for Mary's outfit with a gold halo, browns, greys and greens for most males, with a contrasting head-dress, Rich purples, reds, golds, etc. for the Kings bodies, with golden caskets and crown, and white and gold for the angels, with gold or silver wings and a golden halo. The baby Jesus is a "Hump" under a sheet, with a head and halo outside the sheet, and all in a moulded "basket" or manger made from card. If a small shoebox is available, it is possible to decorate the outside to look like a barn or stable, and place some sand into the lid to serve as the floor. A backdrop in dark blue, with a large silver star and a few dotted smaller stars is a nice touch. After 12th night the sand can be stored in a jar, and the whole scene stored inside the shoe box, ready for next year!!
Thanks to freesvg.org for most of the images.